 |
|
| A Simple Calculator Application |
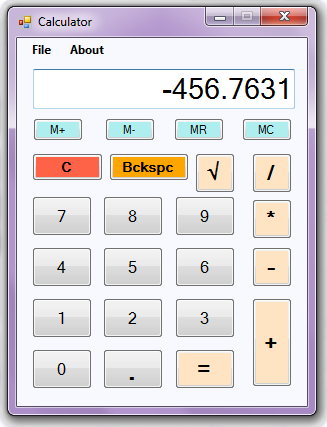
In this tutorial I’m going to show how to customize a C# .net text box which can be used as the display for a simple calculator application.
First open a new Windows Form Application and add a text box to the form. Then adjust its position, size, font size as desired.
Normally calculator displays are right aligned. Therefore we’ll introduce that property to our text box. For that, select the text box by clicking on it. Then go to its properties panel and find the property called TextAlign from the list.
(you can find the properties panel on the lower right corner of the window).
The default value for the TextAlign property is Left. Click on the word Left and a drop down list will open. Select Right from that list and press ENTER.(Figure 1)
 |
||
| Figure 1 |
Now we have finished the basic adjustments. Press F5to run the application and try typing some text in the text box to see whether the properties we set are in effect. (Figure 2)
 |
| Figure 2 |
Can you see a problem in this text box? We can type any character (alphabetical characters, numbers, special characters and punctuation marks) in this text box. Remember that we are going to use this as the display for a simple calculator application. We cannot allow the users to insert any character to a calculator. Only the numbers, decimal sign (.) and minus sign (-) can be allowed to insert. Otherwise an extra effort is needed to program the application to validate the user inputs before they are used in calculations. Therefore we’ll introduce some restrictions to this text box.
If you are still running the application, click the close button on the upper right corner of the form to come back to the IDE. Now select the text box by clicking on it. Then go to its properties panel and click on the icon (which looks like a thunder) called Events (Figure 3). Find the event called KeyPress from the list. This event occurs when the user presses and releases a key.
 |
|
| Figure 3 |
We are going to add some code into this event. So double click on the name KeyPress. The code view of the form will open and you can see the method for KeyPress event there.(Figure 4)
 |
| Figure 4 |
Insert the following code segment into that event. Later I’ll describe what each part of the code does.
if (!Char.IsDigit(e.KeyChar))
{
if (e.KeyChar == ‘.’)
{
if (textBox1.Text.Contains(‘.’))
{
e.Handled = true;
}
}
else if (e.KeyChar == ‘-‘)
{
if (!String.IsNullOrEmpty(textBox1.Text))
{
e.Handled = true;
}
}
else if (e.KeyChar == ‘b’) ;
else
e.Handled = true;
}
In the Figure 5 I have divided the code into segments and numbered them. I’ll describe what each segment does according to the numbers.
 |
| Figure 5 |
- This if clause filters non-numeric characters that should to be handled by this special code.
- If the entered character is decimal sign (.), it is handled by this code segment.
- Calculator display can have only one decimal character. This code segment checks whether the text box already contains a decimal sign and if so, the event is handled without inserting the newly typed decimal sign to the text box.
- If the entered character is minus sign (-), it is handled by this code segment.
- Calculator display can have minus character (-) only at the front of a number. This code segment checks whether the text box already contains some text and if so, the event is handled without inserting the newly typed minus sign to the text box.
- This segment allows the user to delete the already entered characters by pressing Backspacekey.
- All the other non-numeric character events are handled without inserting the characters to the text box.
Now we have completed customizing the text box. Press F5 to run the application and check whether it has all the characteristics we have introduced.


doesn't work for me 🙁 only check first condition!